Finished Basement – Industrial Farmhouse Design
For years we thought about finishing our basement. We found ourselves at the point of deciding whether to move or just bite the bullet and utilize the space we had downstairs. I’m so glad we choose to finish it.
Here I will share the design elements that went into our industrial farmhouse design as well as the process.
This post may contain affiliate links, which means I’ll receive a commission if you purchase through my links, at no extra cost to you. Please read full disclosure for more information.
Design & Planning Basement
Planning
When it came to planning any room remodel, the first thing you want to do is determine how the space is going to be used. I knew we wanted a large open area, a bedroom, a storage closet, and a bar area. I had to take pen to paper and determine where it would make sense to put everything.
Next, we had to decide if we wanted to hire a company, or do it ourselves. We got 3 quotes from companies and with the lowest coming in at over $50,000 for the bare minimum bones, we knew we could do ourselves cheaper and nicer.
Heres a list of what to do when planning your basement remodel:
- Evaluate the space
- Determine how the space will be used
- Assess the basement’s potential design obstacles and challenges
- Determine a budget and identify your spending priorities
- Research and meet with several basement remodeling companies
- Choose the interior finish materials (flooring, countertops, lighting, plumbing fixtures, etc.)
- Let the remodeling and finishing begin
Design
Next came my favorite part: the design! For our finished basement, I had a few options: rustic, industrial, or farmhouse. I decided to go for an industrial farmhouse design (with a bit of rustic mixed in). I felt like I could blend the designs together to make it cozy and comfortable. One of the design elements I knew for sure that I wanted was barn doors and industrial pipes. Knowing what design you want will help you to make all the little decisions when it comes to finishing the basement.
Basement Storage Closet
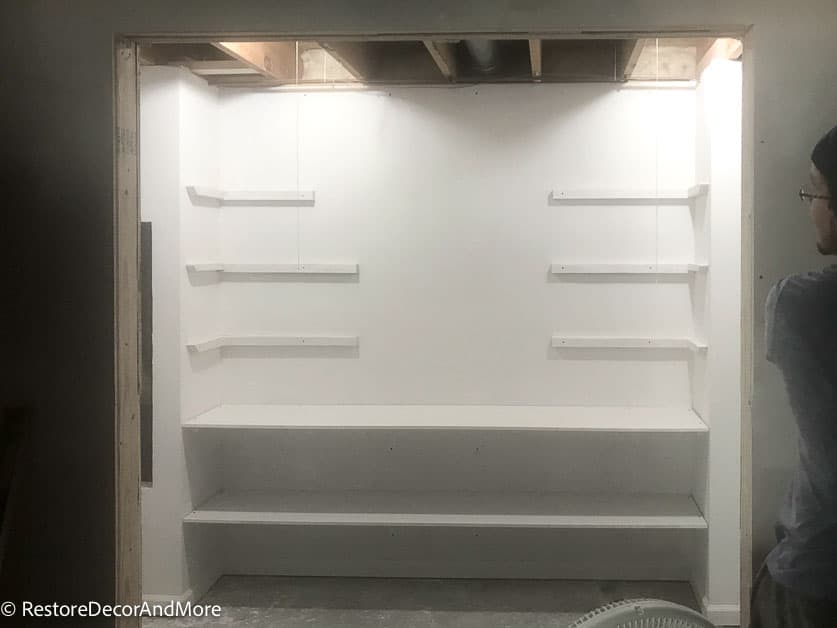
Our basement storage closet was a project we did before we went ahead and finished the entire basement. We had storage under our stairs but I wanted more of a closet area where I could put bins on shelves.
On the back wall, we added shelves all up to the ceiling.
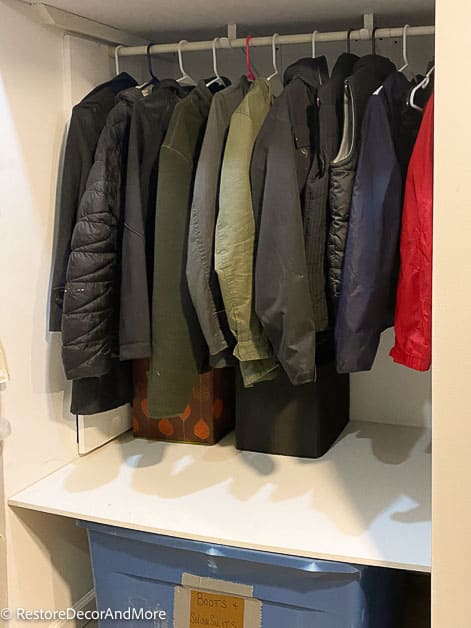
On the right side, I wanted a hanging bar to store all the winter coats during the warmer months. We added a shelf under and above for more bin storage. We finished it off with barn doors.
Related: Closet Door Alternatives


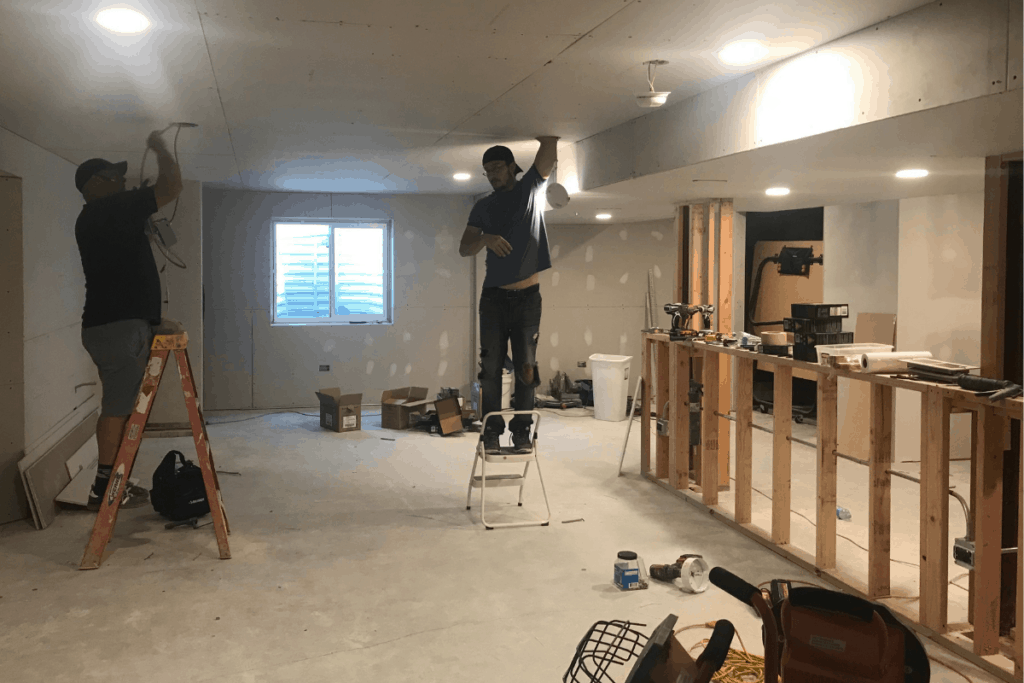
Framing & Drywall
Framing
It was now time to frame the basement. Family Handyman has a great guide on how to finish, frame, and insulate a basement. I made a few adjustments to the layout of the basement as we were framing.
For example, I added a small wall behind where the bar was going to fit the refrigerator in there. I’m so glad I did this because it would have looked bad without it. We made sure to double up the base-treated wood.


Drywall
We had all the drywall delivered and were able to hang it all pretty quickly.


Electrical
We went with can lighting in our basement with switches that dim. One of the best tips we got was to put some of them on different switches so that we could control certain sections of lighting.


Basement Ceiling
I considered many different basement ceiling options: Drywall, drop ceiling, painting the basement ceiling black, etc. Originally I was leaning towards a dropped ceiling in the basement.
At the end of the day, I wanted an inexpensive basement ceiling that looked nice. I decided to go with drywall because I liked the cleaner look, it was the most cost-effective, and all of our ductwork, etc was already in the soffit.
Finished Basement Floors
When it came to our flooring my husband and I debated on this one a bit. I wanted some carpet to warm up the space. He wanted all hard surfaces in case of any flooding. We compromised on putting carpet down in the main living room area and bedroom and adding vinyl flooring to the rest.

Carpet
We bought the carpet at Home Depot which included free install, so this step was easy for us! One thing I am glad we decided to do was to purchase the upgraded padding. What a difference that makes!


Luxury Vinyl Plank Floors
For the hard surfaces, flooring that was waterproof was our main priority. This meant going with some sort of vinyl basement flooring. After doing our research we decided on Sterling Oak Lifeproof Flooring from Home Depot. They also have a ton of other colors to choose from.
I absolutely love these floors. They are scratch-resistant, stain-resistant, easy to clean, and look great. Check out my full review on this flooring as well as how it has held up over the years here.

Finished Basement Walls
One of the design elements that I wanted for the basement was some accent walls to give the room texture and depth. I was able to do this with a faux brick wall up the staircase, as well as a black faux shiplap wall behind the bar area.
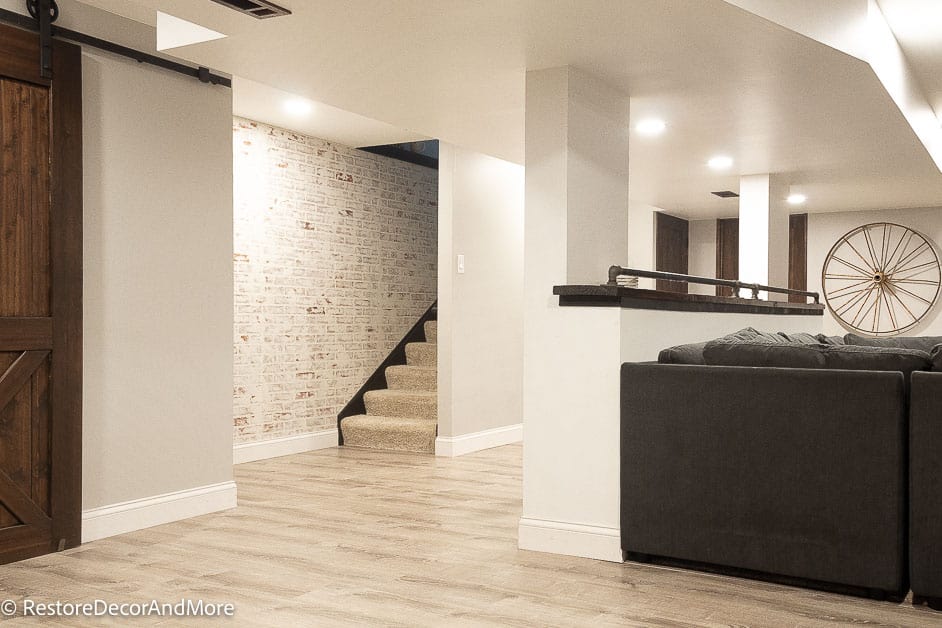
Faux Brick Wall
Originally I had envisioned a stone wall going up the stairs, but after pricing it out there was no way that was going to happen! So I decided on a brick accent wall. I’m glad I did because this faux brick wall is one of my favorite projects I have done. We used faux brick wall panels which were very inexpensive, and we had it done in a day.
Check out the full tutorial on how we created this brick wall.

Black Shiplap Wall
For the wall behind our bar area, we decided opted for a DIY faux shiplap wall. In order to keep costs down, we used plywood to create the shiplap look without the extra expense.
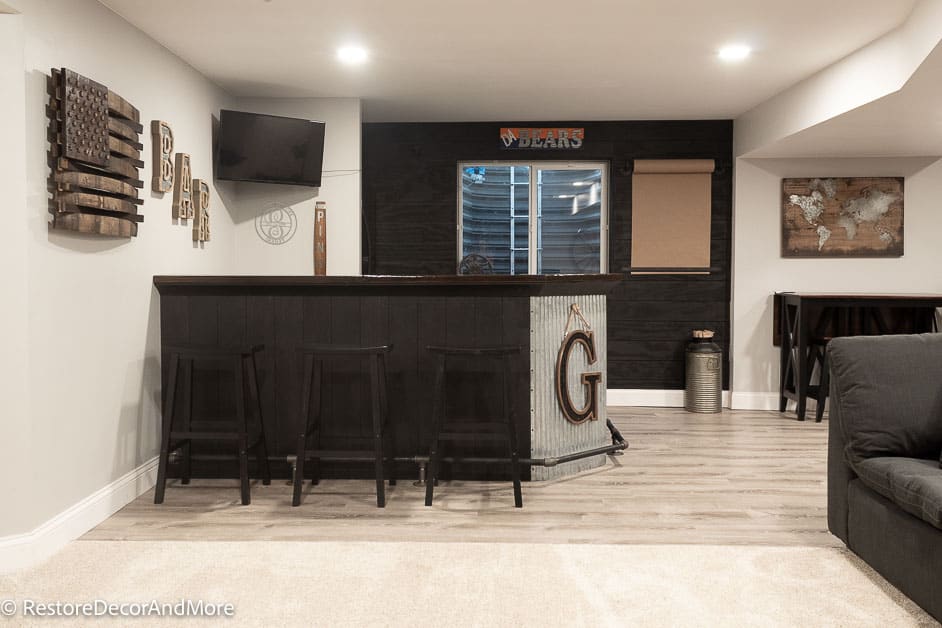
For this area, we choose a bold black accent wall that fits right in with the design.

Basement Wall Paint
I knew I wanted to go with gray paint for the remainder of the walls. As you can see I was struggling a bit with which color to go with! After living with the samples for a few days we decided to go with Stonington Gray by Benjamin Moore.
Since redoing the basement, I discovered this peel & stick paint samples that would have made this process a lot easier.

Trim
We decided to upgrade a bit and go with the larger trim. I really feel like this was well worth the money it makes such a huge difference in the space.

Finished Basement Stairs
After we had the carpet installed on the basement stairs, I felt like it was missing something. I decided to paint the sides, ledge, and railing black. This took some work but well worth it in my opinion. I just love the way black stairs pop and it adds some character.


Basement Dry Bar
One thing that I knew I wanted for sure was a basement bar. We opted for a dry bar since it was way more budget-friendly. I designed it myself and made sure to add industrial elements to it. We hung the shiplap vertical to give it a bit more contrast.
This bar was easy to DIY and very low cost. Check out how we built our bar here.

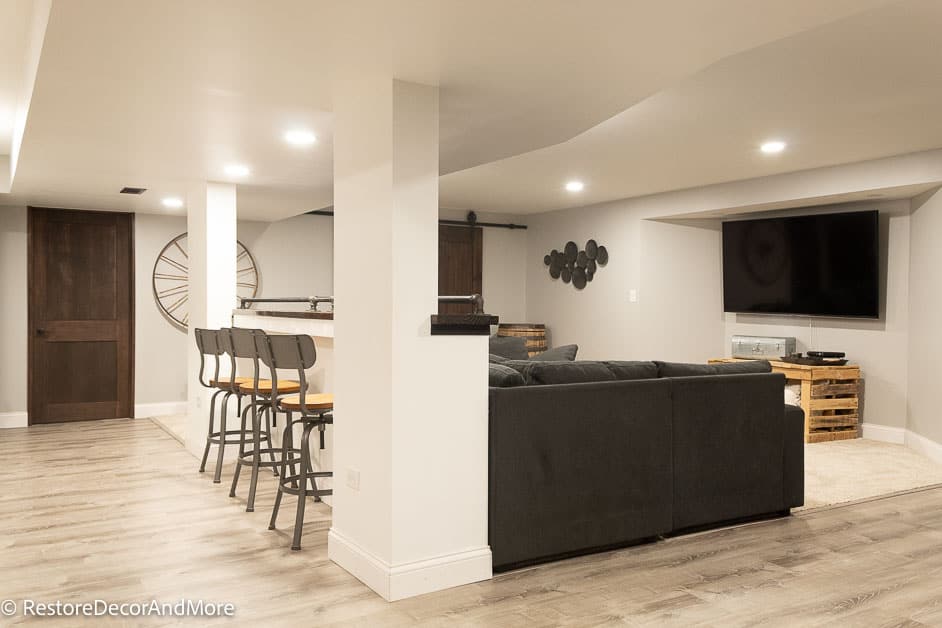
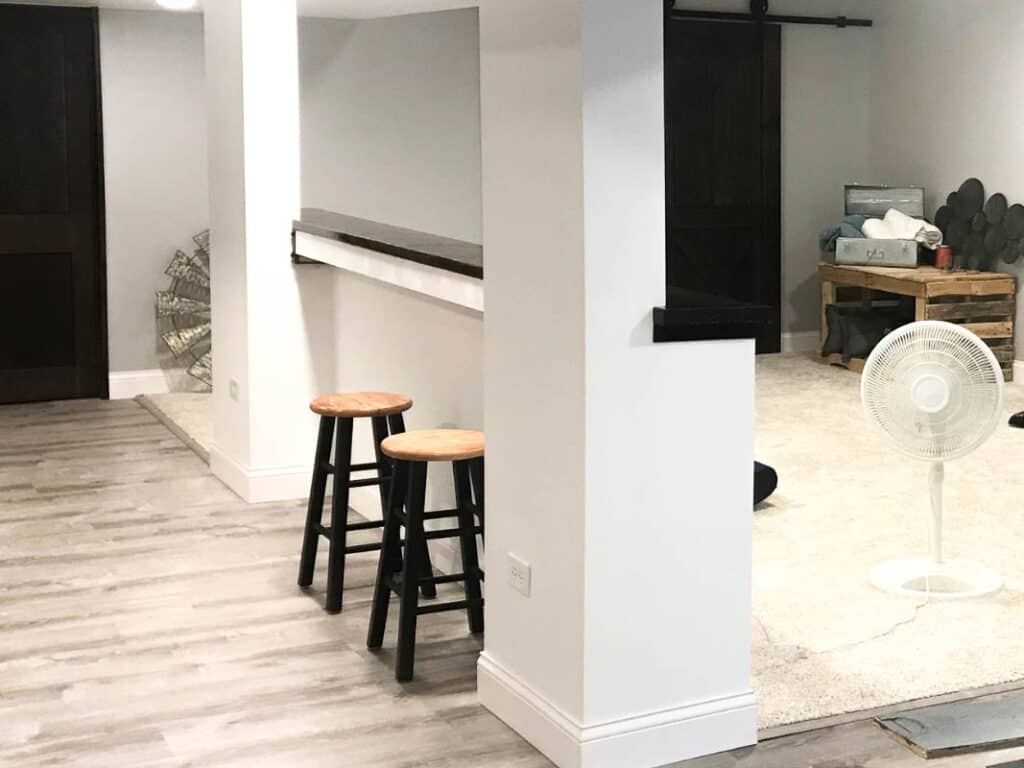
Bar Behind Couch
When it came to deciding what to do with the posts, I knew I wanted a countertop behind where the couch would be. It would not only give us some extra seating but also a place for people to set drinks ect down on when sitting on the couch. (I knew for sure my kids would need this!).
I had to widen the columns more than I wanted because square posts would not have been centered to where our tv nook was. Sometimes you just have to compromise with details like this. It would have bothered me more if the whole thing was off-center.
The industrial pipe on the counter was probably my biggest struggle with this basement. I wasn’t sure if I liked it or not! Let’s just say it took almost a year before we screwed it in lol.


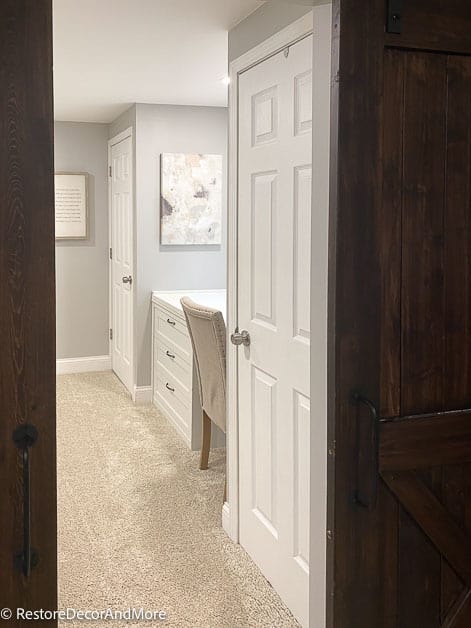
Guest Bedroom
On to the basement bedroom! We had a few design challenges when it came to the bedroom. Our sump pump, electrical panel, window, and soffit were all in the bedroom. One by one we were able to figure it out.
There was a small cut-out area that I knew I was going to make into a closet. The closet to the left of the desk is where our sump pump is. I didn’t like the way it looked with a random corner closet, so I decided to balance it out, we needed another closet on the right-hand side. Then I put in a built-in desk with dresser drawers for clothes.
Tip: We added the wall space heater which I’m so glad we did because it can get really cold here in the winter.
We continued the Stonington Gray paint through the basement bedroom.
There are many ways to hide your electrical panel, but we opted for this large mirror.


Window Well
For the window well, we chose to spray paint the inside of it black and add red rock to the bottom.

Reveal & Finishing Touches
Finished Basement Furniture
Since our basement is a frequent hangout spot for movie nights, sleepovers, and overall teenage hangouts we knew we wanted a large modular sofa. I have always loved the cloud couch but not the cost! So I set out to find a cloud couch dupe that still looked good but wouldn’t cost a fortune.
We went with the Savesto sectional from Ashley Furniture.
This is probably the most comfortable couch I have ever sat on!! We also bought an additional ottoman, so it basically turns into a sofa pit when we have them both pushed in.
Related: Check out our full Savesto review on how this couch has held up after 4 years.

Finished Basement Farmhouse & Industrial Decor
This globe was a treasure from my husband’s childhood. We dug it out of our in-law’s attic and gave it some black spray paint.
I found the wheel at a local vintage shop. The stand underneath I have had for years but don’t remember where I got it from!
Related: Decorating on a budget

Double Barn Doors
Can you have an industrial farmhouse basement without barn doors?!
We went with double barn doors for both our guest room and our storage closet. I stained them myself and then we installed them. Check out our post on our barn doors here.


Whiskey Barrel
This is actually a whiskey barrel where the top comes off. I had originally wanted it to store extra blankets in it, but quickly realized there once was whiskey in it….lol! The smell is way too strong but I still love the way it looks. I can’t find the one we ordered but this one is similar and can be ordered online.
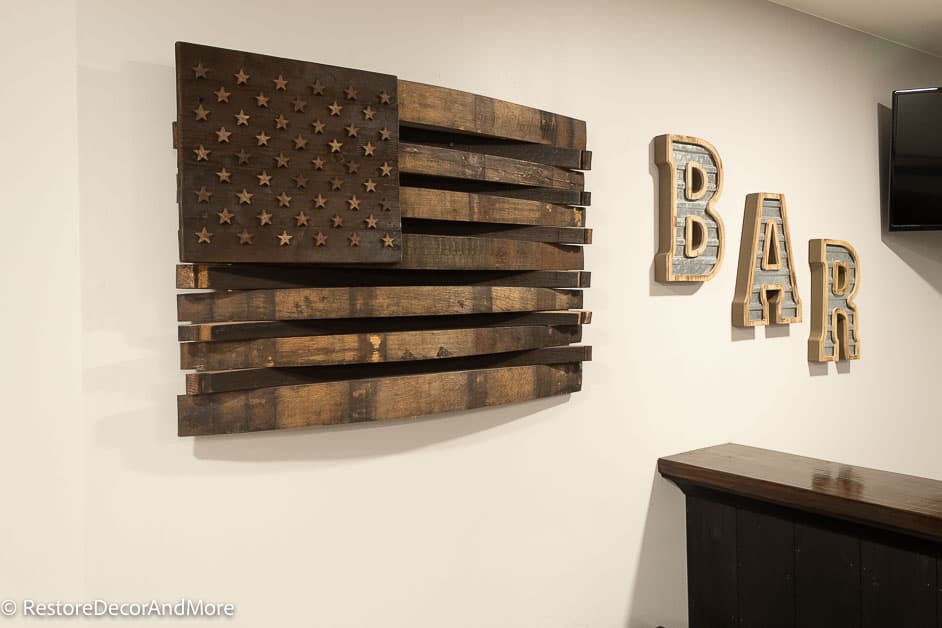
Whiskey Barrel American Flag
I wanted to find some unique wall decor that wasn’t just pictures. I fell in love with this flag as soon as I saw it. It was made out of an actual Jack Daniels Whiskey Barrel! We came across it from a local vendor at an outdoor vintage fair, but they have the exact same one on Etsy.
The Bar sign letters are from Hobby Lobby. They also have the same style on Amazon.
Kraft Paper Scroll
We made the paper scroll ourselves using a dowel that I spray painted black and some industrial pipe holders I found. Then we added this Kraft paper to complete the look.
Pallet Wood Stand
Our pallet wood stand was another local vintage fair find. I plan on doing a custom built-in for around the tv but that project will have to wait a while! In the meantime, I’m enjoying this unique table.


Farmhouse Wagon Wheel
I really wanted an old wagon wheel for the wall and our buddy who helped us finish the basement knew it! He found this one driving down the road and was able to purchase it from the owner. This sucker is heavy so hanging it was a challenge but we made it work!
You can also find tons of old wagon wheels on Etsy if you can’t find one locally.

Industrial Farmhouse Finished Basement After

Conclusion
This project was a labor of love. Now that we have finally finished the basement, we can enjoy all the extra space. It was worth all the long hours for sure! I still want to do a few things decor-wise but for now, we are just having fun hanging out in it.