Shiplap Fireplace Wall: How To Do It Cheap & Easy
When I decided to tackle our family room makeover, I knew that I wanted a white shiplap fireplace accent wall. The texture and rustic wood not only give the walls a bit of dimension but it would also add a visual focal point for the room.
I love the way our faux brick accent wall turned out, but I really wanted to do shiplap somewhere. Since my design style has been leaning towards more of a farmhouse look lately, I knew the fireplace wall would be a perfect place for shiplap.
However, I was not interested in paying almost $10 per board! Since I love decorating on a budget, I set out to find a cheaper shiplap option.
What is Faux Shiplap?
Since I was looking for a more budget-friendly option, I decided to go with a plywood shiplap wall. Since we had already tried this with our basement shiplap wall, I decided to do it again!
This is a fairly easy DIY project that you can tackle yourself in just a few steps.
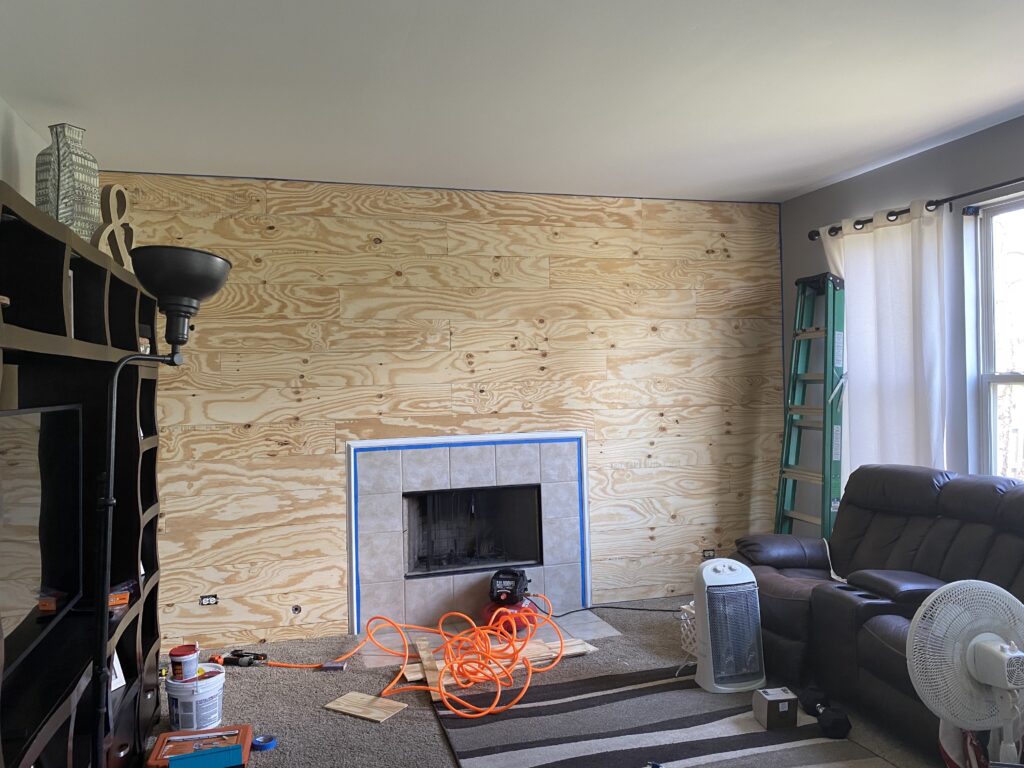
We purchased a few sheets of 8×4 plywood from Home Depot. The nice thing is that Home Depot will cut the wood for you! I wanted to go with a thicker 8-inch look, so we had them cut each sheet into 6 strips.

This post may contain affiliate links, which means I’ll receive a commission if you purchase through my links, at no extra cost to you. Please read full disclosure for more information.
Materials Used
- 8×4 Plywood
- Liquid Nails
- Spacers (we used quarters)
- Nail Gun
- Nail Gun Nails
- Sandpaper
- White Paint
- Table Saw
- Level
How To Install Shiplap Wall
Step 1: Prime Wall
Since our wall was a dark purple color, I primed it first so that I wouldn’t see the purple through the spaces.

Step 2: Locate Studs
Next, we made sure to locate all the studs with a stud finder and mark them with a pencil line so that we would have a guide. (It’s hard to see in the photo but they are there!)
If you haven’t installed drywall yet, you can attach the shiplap directly to the studs.

Step 3: Hang plywood shiplap
Once it was time to hang the boards, we started with a full piece at the ceiling.
Make sure to use a level because the ceilings are not always straight.
To hang the wood, we started with an 8-foot long piece. You can apply some liquid nails to the back of the wood, but we decided to skip this step since our plywood was so thin.
Once we had it in place, we used a nail gun to nail the wood into each stud. We chose to nail the top and bottom of the board into each stud it hit.

After the first board was up, we measured the distance between the end of that board and the wall and then cut the next board down to the length we needed. Follow the same steps from the first board (fit onto the wall, the nail into the studs).
Then, for the second row, we started in the corner with the leftover piece for the board we just cut. Place that piece below the board and make sure to use a spacer to allow equal gap widths between the rows. We used quarters and made sure to put a few in to ensure it was level and equally spaced. Then repeat the process of nailing into the studs.

Continue to repeat this process until all the plywood boards are on the wall. I didn’t want a perfect wall so I would step back after each row, look at the pattern, and adjust the next row accordingly.
We continued on in that manner until the wall was complete! We did need to cut around an electrical outlet so we measured the location of the box and used a jigsaw to cut the opening. Since you will be covering it with a plate the cut doesn’t need to be perfect.
Step 4: Caulk Nail Holes In Wall
Next, it’s time to fill in all of your nail holes. We used some sandable, paintable caulk. Once they are dry, run a piece of sandpaper over the holes to smooth them out. If you want a smooth one-board look across the entire wall, you can choose to fill in the space where the boards butt up to each other. I choose to leave it for this wall since I was going for a less clean, more rustic shiplap wall.
Step 5: Paint Shiplap Fireplace Wall
Once everything has dried, it was time to paint! Since I wanted a white shiplap wall we went with a crisp white in an eggshell finish to complete the look. We were able to roll the wall with a paint roller and it was pretty quick and easy.

Step 6: Trim Edges
Once the wall is complete, you may want to trim out the edges. You can use caulk, quarter-round, or any other trim you want.

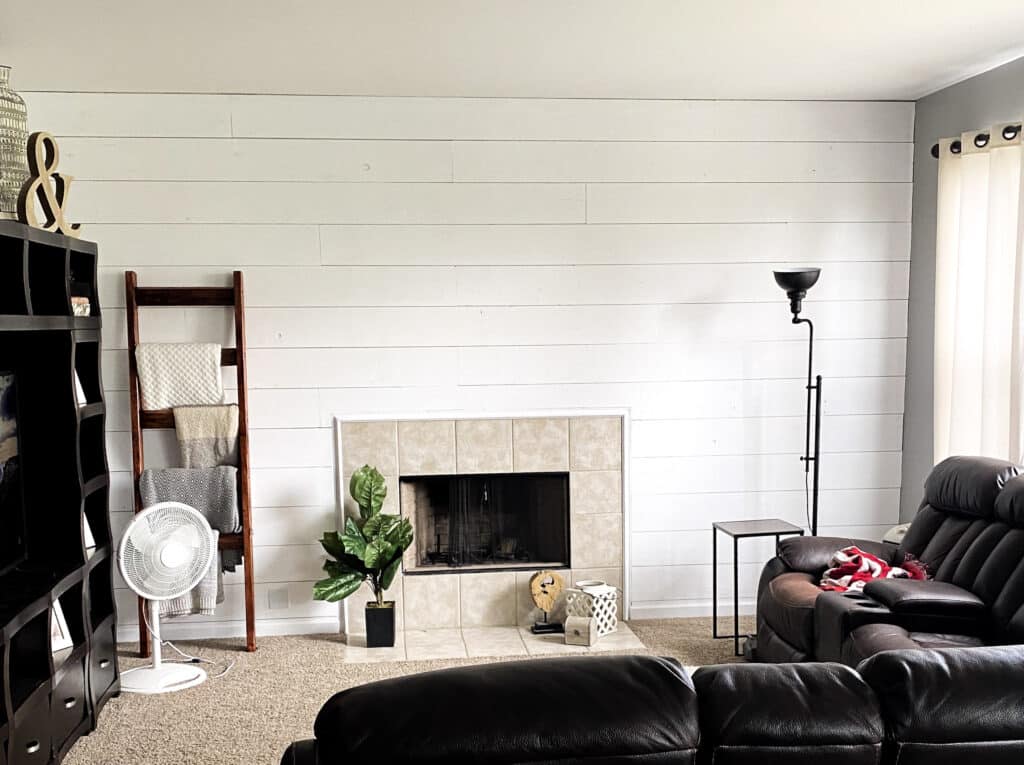
I absolutely love the way our shiplap fireplace wall turned out! I also love how easy, quick, and cheap this project was!! If you are looking for just a shiplap fireplace without committing to the entire wall, check out these 25 stunning shiplap fireplaces!
Now that the wall is done, it’s time to paint the inside of the fireplace and get rid of that ugly tile.
UPDATE: Check out the complete fireplace remodel to see how it all came together with new brick tile and a custom mantle!